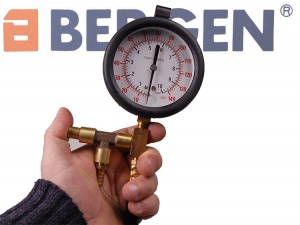
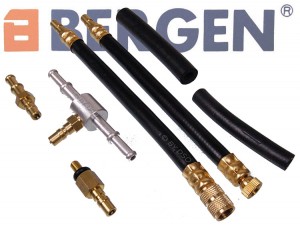
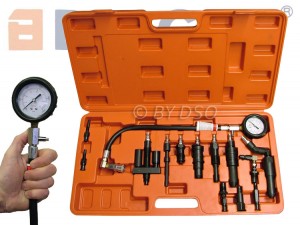
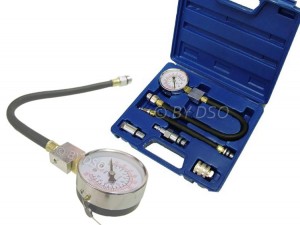
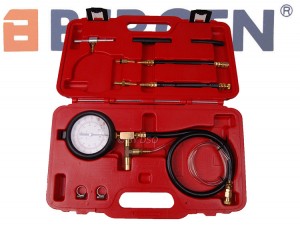
 Because fuel systems and access points are so varied, it is impractical to list all of the applications. Always refer to a reliable shop manual, or the car manufacturer for the recommended test procedure and access points.
1. Disconnect fuel pump at rear body connector (electrical). Start engine and run engine until it stalls. Crank starter for 3 seconds to remove remaining fuel from fuel lines. Reconnect rear body connector. 2. Connect Fuel Pressure Gauge to fuel pressure fitting on fuel rail. 3. Reconnect fuel pump. 4. With gauge installed at fuel rail connector, turn ignition on. With ignition on and engine off, pressure should read within specifications. 5. Start engine. Pressure should drop 3-10 psi.
CAUTION: High fuel pressure may be present in fuel lines and component parts. Relieve pressure before attempting to open system for testing or component replacement. DO NOT allow fuel to run onto engine or electrical parts or allow an open flame in area while testing fuel system components.
1. On 2.2L & 2.2L Turbo models, relieve fuel line pressure by disconnecting fuel pump relay and starting engine. After engine stalls, turn ignition off. Reconnect fuel pump relay. 2. On all other models, remove fuel tank cap. Using Fuel Pressure Gauge, release pressure from system at pressure relief valve (Schrader valve) on fuel injection manifold rail. 3. The fuel pump may be activated by grounding the fuel pump lead at the SELF-TEST connector. Use a jumper lead and ground the “FP” terminal with ignition on. This activates the fuel pump. CAUTION: Inspect fuel system for leaks or damage before testing fuel pump.
1. Disconnect wiring at inertia switch. Inertia switch is located behind trim panel in right rear side of cargo area on Sable and Taurus station wagons and behind trim panel on left side of trunk on all other models. Crank engine for at least 15 seconds to reduce system fuel pressure. 2. Disconnect fuel supply line at throttle body. Install in-Line Adaptor and fuel Pressure gauge at fuel filter. Reconnect inertia switch and start engine. Check fuel pressure at idle and when accelerating engine. Pressure should remain stable through entire period of acceleration. 3. If gauge readings are correct, disconnect inertia switch. Crank engine for 15 seconds to reduce fuel pressure. Remove gauge and in-line adaptor. Install original fuel line and connect inertia switch. Start engine and check for fuel leaks.
High fuel pressure may be present in fuel lines and component parts. Relieve pressure before attempting to open system for testing or component replacement. DO NOT allow fuel to run onto engine or electrical parts while testing fuel system components.
1. Release fuel pressure. Disconnect 5/16″ fuel supply hose. Connect fuel system pressure Gauge between fuel supply hose and engine fuel line. 2. Turn ignition on. Activate fuel pump. If fuel pump pressure is at specification, fuel system is functioning properly. 3. If fuel pressure is not to specification, record pressure. Install fuel pressure gauge in fuel supply line at rear of vehicle between fuel tank and fuel filter. 4. Activate fuel pump. Record pressure reading. If fuel pressure is 5 psi higher than the first pressure reading, replace fuel filter. 5. If no change in pressure reading is observed, gently squeeze fuel return hose. If fuel pressure increases, replace fuel pressure regulator. If no change in fuel pressure is observed, problem is plugged fuel pump filter sock or defective fuel pump. 6. If fuel pressure is more than specification, remove fuel return hose at rear of vehicle. Connect an extension hose to return hose. Place hose in an approved container with at least a 2 gallon capacity. 7. Activate fuel pump. If fuel pressure is now within specification, check in-tank return fuel hose for kinking. Replace fuel tank assembly if in-tank reservoir check valve or aspirator jet is plugged. 8. If fuel pressure is still more than specification, remove fuel return hose from throttle body. Connect a substitute hose to throttle body return nipple. Place other end of hose in an approved container. 9. Activate fuel pump. If fuel pressure is at specification, check for a restricted fuel return line between throttlebody and fuel tank. If no change was observed, replace fuel pressure regulator. NOTE: Perform fuel pump test with fuel tank at least half full. Before disconnecting a fuel line during testing, repeat fuel pressure release procedure.
1. Release fuel pressure. Remove cap from service valve on fuel rail. Connect fuel system pressure Gauge to service valve. 3. If fuel pressure is not to specification, record pressure and remove gauge. Activate pump. Ensure no fuel leaks from service valve. Install cap on service valve. 4. If fuel pressure is not to specification, install pressure gauge in fuel supply line between fuel tank and fuel filter at rear of vehicle. Activate fuel pump. 5. Record pressure reading. If fuel pressure is 5 psi higher than the first pressure reading, replace fuel filter. If no change in pressure reading is observed, gently squeeze fuel return hose. 6. If fuel pressure increases, replace fuel pressure regulator. If no change in fuel pressure is observed, problem is plugged fuel pump filter sock or defective fuel pump. 7. If fuel pressure is more than specification, remove fuel return hose at rear of vehicle. Connect an extension hose to return hose. Place hose in an approved container with at least a 2 gallon capacity. 8. Activate fuel pump. If fuel pressure is now within specification, check in-tank return fuel hose for kinking. Replace fuel tank assembly if in-tank reservoir check valve or aspirator jet is plugged. 9. If fuel pressure is still more than specification, remove fuel return hose from pressure regulator. Connect a substitute hose to fuel pressure regulator. Place other end of hose in an approved container. 10. Activate fuel pump. If fuel pressure is at specification, check for a restricted fuel line. If no change was observed, replace fuel pressure regulator. NOTE: Perform fuel pump test with fuel tank at least half full. Before disconnecting a fuel line during testing, repeat fuel pressure release procedure.
1. After relieving fuel pressure connect Fuel Pressure Gauge at 6mm service bolt location. Reconnect negative battery cable. Start engine and note pressure. If vehicle will not start, has spark, and no fuel pressure is evident, inspect fuel pump main relay. 2. Disconnect vacuum hose from pressure regulator and inspect for manifold vacuum. If vacuum is not present, check for restriction in vacuum port or hose. Plug vacuum hose and note fuel gauge reading. Gauge reading should be 36-41 psi. Pressure should have risen slightly when vacuum hose was disconnected from pressure regulator. 3. If pressure is higher than specified, inspect for pinched or clogged fuel return line between fuel rail and fuel tank. If no problem is found in fuel line, replace pressure regulator. 4. If pressure is lower than specified, inspect for plugged fuel filter. If filter is not plugged, lightly pinch off fuel return line. If fuel pressure does not rise, replace fuel pump. If fuel pressure does rise, replace pressure regulator.
FUEL PUMP QUICK TEST 1. Turn ignition on, with engine off. On all except Van, place jumper wire across”+B” and “FP” terminals of engine check connector in engine compartment. On Van, place jumper wire across 2. wire fuel pump check connector (White/Black and Green wires) located under driver’s seat.2. On all models, listen for fuel pump running sound. Feel for pressure in fuel line between filter and fuel rail. Turn ignition off. Remove jumper wire. If fuel pump sound was present and fuel hose showed pressure.
3. If no pressure or fuel pump sound was present, on all except Van, connect a jumper wire from battery sources to “FP” terminal of engine check connector. 4. On all except Van, if fuel pump does not run or no pressure is felt in line, check for defective fuel pump. Check for open circuit between engine check connect and fuel pump or poor fuel pump ground. NOTE: All models use in-tank fuel pump. Fuel pump contains internal relief valve and check valve.5. If fuel pump ran after battery source as connected to “FP” terminal in step 3, check EFI main relay and relating wiring. Also check “EFI” and “IGN”fuses.
NOTE: Before testing fuel pressure, check all fuel delivery and return lines for leaks. 1. Ensure battery is fully charged. Turn ignition off. On all except Pick-up and 4Runner with 3VZ-E, place container or shop towel under cold start injector. Slowly loosen cold start injector union bolt to relieve fuel pressure. Remove union bolt and 2 gaskets. 2. Install fuel pressure gauge to the cold start injector delivery pipe. Wipe off excess fuel. 3. On all except Van, install jumper wire between engine check connector “FP”and”B” pins. On Van, place jumper wire across 2-wire fuel pump check connector (White/Black and Green wires). 4. On all models, turn ignition on, with engine off. Measure fuel pressure. Fuel pressure should be same as regulated pressure. 5. If fuel pressure is high, replace the fuel pressure regulator. If fuel pressure is low, check the following: Fuel hoses and connections, Fuel filter, Fuel pump, Fuel pressure regulator. 6. Remove jumper wire installed in step 3. Start engine and run for 2 minutes. Disconnect vacuum sensing hose from fuel pressure regulator and plug hose end. Fuel pressure regulator is mounted on fuel rail. NOTE: On Celica (3S-GTE), Corolla (4A-GE), MR2, Pick-up, MRunner, and Van it is necessary to allow engine to idle for 2 minutes to stabilize fuel pressure. These models are equipped with a fuel pressure-up system which temporarily increases fuel pressure after a hot start. 7. Measure regulated fuel pressure at idle speed. 8. With engine still idling, reconnect fuel pressure regulator sensing hose. Measure regulated pressure at idle. 9. If regulated pressure was not specified, check vacuum sensing hose fuel pressure regulator. On models so equipped, check fuel pressure-up system. 10. Stop engine. Note fuel pressure. Leave fuel pressure gauge attached to engine for at least 5 minutes. 11. Residual fuel pressure after 5 minutes should be at least 21 psi (1.5 kg/cmý). If pressure is not as specified check for leaking injectors, fuel pressure regulator or bad check valve in fuel pump. 12. Relieve fuel system pressure. Remove fuel pressure gauge. Reconnect cold start injector. Run engine and check for fuel leaks.
1. Remove fuel tank cap. 2. Turn ignition on and listen for fuel pump operating sound for approximately 2 seconds. If there is not sound, check fuse, fuel pump relay, fuel pump and all electrical connections.
1. Remove air cleaner and check for any visible fuel leaks. 2. Push airflow sensor plate down manually. 3. Uniform resistance should be felt throughout travel after slight amount of free travel. No binding should be felt when sensor plate is released. 4. Upward movement of sensor plate should be slow with slight resistance from control piston adjusting lever. No binding should be felt. Push airflow sensor plate down and hold briefly. Slight fuel seepage past control is acceptable.
NOTE: Control pressure is measured with the valve open and system pressure is measured with valve closed. 1. Install Fuel Pressure Gauge and Adaptor between the fuel distributor test port and cold start valve. Ensure control lever is in the closed position. Bleed excess air from system by cycling control valve with gauge upside down. 2. Using a jumper wire, connect terminals No. 30 and 87 on fuel pump relay. Open fuel pressure gauge control lever. Fuel pressure should be within specification If fuel pressure is low, perform fuel volume check. If fuel volume is okay, replace fuel pressure regulator. 3. If fuel pressure is above specification, remove return hose from pressure regulator and repeat test. Fuel pressure should be within specification. If okay, check for restricted fuel return line. If pressure is incorrect, replace fuel pressure regulator.
1. Install Fuel Pressure Gauge at fuel supply hose 3-way “T” connector. 2. Turn ignition on. 3. With fuel pump operating, minimum pressure should be within specification. if fuel pressure is incorrect, inspect for restricted fuel lines, defective fuel pump or weak pressure regulator. Author – Tony Heywood  Tony Heywood is a ‘Retail Troubleshooter’ with 40 years experience in the retail industry, specialising in e-commerce over the last decade. He has his own consultancy firm and is MD of ’e sell it’, an on-line store selling tools and auto-care products worldwide. For tools & auto-care products at trade prices, please visit: www.esellit.com Or call: 020 8201 0588 http://www.youtube.com/watch?v=ctqQfd3hH4g
