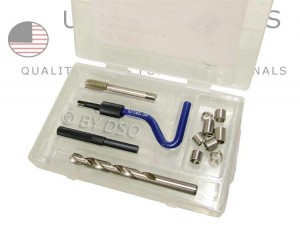
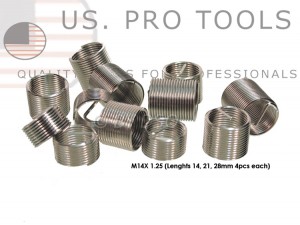
Damaged threads are a common problem among older vehicle models. Instead of taking it to a professional mechanic, many people prefer to do a thread repair at home with a Helicoil repair kit. The easiest way to do that involves a heli coil insert.
Are you interested in learning how to repair a damaged thread with a heli coil insert? Follow these tips for professional results.
Before you attempt to do the repair, make sure that you have everything necessary.
There are certain things you will have to purchase in advance. A heli coil thread repair kit is the first and the most important piece. You will also need a two-handed tap wrench, thread gauge, the specified drill bit, a hammer, needle-nosed pliers and a round punch.
Heli coil thread kits consist of a high-speed steel drill, an installation tool, stainless steel wire coil and a tap. There could be some variations so read about the contents of the kit before you buy.
2. Do Some Measuring
Begin by identifying the original bolt’s size. You can do that easily by matching the head to a wrench. Once you have made sure that you have the correct size, use the set of thread gauges to find the matching piece and identify the bolt size.
Now that you know the size of the original bolt, you can select a tap from the heli coil kit. Keep in mind that the new diameter is going to be slightly bigger than the size of the bolt but the threads are going to be the same.
3. Drill and Insert
Use the correct tap bit to drill out a hole. A drill press can be used to make more precise adjustments, in case the bolt angle is critical.
Next, use the two-handed tap wrench. Insert the tap into it and place it in the hole you just drilled. Hold the two-handed tap wrench at a right angle to the surface. Turn the wrench clockwise just half a turn. It would be sufficient to start the thread.
Once you accomplish that, turn the two-handed tap wrench anticlockwise just a third. It will break the ribbon of metal. Now you should rotate clockwise once again, half a turn. Next, reverse the direction and rotate anticlockwise to break the swarf. The pattern should remain the same until you manage to fully cut the new thread.
Now that the new thread is cut, you are ready to pick the right heli coil insert. The kit contains a matching thread driver. Get the heli coil insert and screw it onto the end of the thread driver.
Keep the wire at the end of the insert at a 90-degree angle. It forms a break-off tab that prevents the insert from moving in the thread driver. Place the end of the insert into the newly made and threaded hole. Screw it in. Three to four turns should be sufficient. Make sure that it binds. Once the heli coil has been screwed in, snap the 90-degree wire off. Use a hammer to do that.
This is it! Screw the original bolt in. Test fit into the heli coil insert to make sure that you have done a good job.
Author – Tony Heywood

Tony Heywood is a ‘Retail Troubleshooter’ with 40 years experience in the retail industry, specialising in e-commerce over the last decade. He has his own consultancy firm and is MD of ‘e sell it’, an on-line store selling tools and auto-care products worldwide.
For tools & auto-care products at trade prices, please visit: www.esellit.com
Or call: 020 8201 0588


June 17th, 2013 on 1:42 pm
I value the article.Really looking forward to read more.
June 20th, 2013 on 12:39 am
I like this post, enjoyed this one appreciate it for putting up.
June 22nd, 2013 on 10:48 am
Good day! This is my 1st comment here so I just wanted to give a quick shout out and say I truly enjoy reading your blog posts. Can you recommend any other blogs/websites/forums that go over the same topics? Thanks for your time!